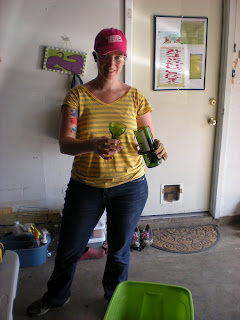
So I had this awesome, totally inspired plan for lighting the main pathway to the garden. The one going from the front gate to the front door. It was going to involve inverting empty beer and wine bottles and burying them in the ground, in a straight line on either side of the path. Every 5 feet or so, the bottles would have LEDs in them, and they would act as running lights to light the way at night.
I had been toying with this idea from well near the inception of the whole front yard project, and I was pretty attached to it. Sadly, in the end, it wasn't to be. I couldn't find LEDs that would fit the project (which is not to say that they don't exist - just with my limited electrical knowledge, I couldn't dig them up). I also didn't really want to expand my DIY realm into my home electrical system. The project would require not only installing the LEDs into the bottles, but also connecting the LED power source to the same wiring that powers my porch light. I tried to involve a landscape lighting specialist but we never seemed to get our conversations off the ground.
I finally decided that I needed to at least do some testing of the process to figure out whether or not to continue to pursue the project or to just let it die a dignified death. As previously stated, I ended up having to let it go, but in the interest of sharing the DIY-Love, here is the process I followed. Maybe somebody will be inspired and will be able to make this work in their own project...
So, to prepare the bottles, the ones that were to house wiring and LEDs would need to have much wider openings than the standard beer or wine bottle. That meant I had to figure out a way to cut the necks off the bottles. After studying some HGTV segments and some online ads for bottle cutting gadgets, here's the process I came up with:
Wearing heavy leather gloves and glasses, I used a glass cutter to scribe the straightest line possible around the neck of a bottle. It worked best when I didn't make any "double cuts". Just one time around, and good luck making the ends meet. The towel helped stabilize the bottle as I turned it to scribe the line.
After the line was cut, heat was applied to stress the glass and encourage the break to follow the line I had scribed. I tried several little torches, but in the end, a cheap citronella candle was the most reliable heat source. (Yep, a little discontinuity here with the bottle. Oh well.)
I had to do a little experimentation to figure out how long to heat the cut. As it turned out, the longer I could stand to heat it, the more likely it was to break cleanly for me. Go figure! It was hard to be patient though, because I was just so excited!!

This one gave a pretty nice, clean edge. The next step was to put the cut end of the bottle on a piece of sandpaper that was laying on my work table and spin it until the edge was smoothed out. Forgot to take a picture of that.


This is the same bottle from the very first picture. I had heated this one more, and it didn't need any tapping when it was in the ice bath. It just made that cool noise and broke clean.


No comments:
Post a Comment