Before I got going today, I took a few pictures of where I left off yesterday, as promised. However, I'm not going to go update them to yesterday's post. Moving forward, I say...
This is the "driveway" path. Just about finished it!

Trent had to help me move that stone there in the bottom left corner. That beast was HEAVY!

Center path. The bottom left corner is the weed cloth in one of the "sidewalk" paths, waiting for me to finish it with sand and stone. In due time, my friends. In due time.

I was playing around with getting up on a ladder for better pictures.

This is the path closest to the house on the driveway side. I got this path laid and blended in with the center path.
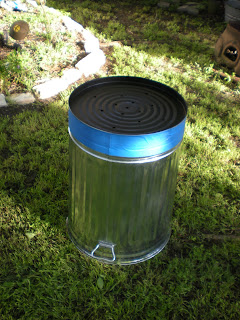
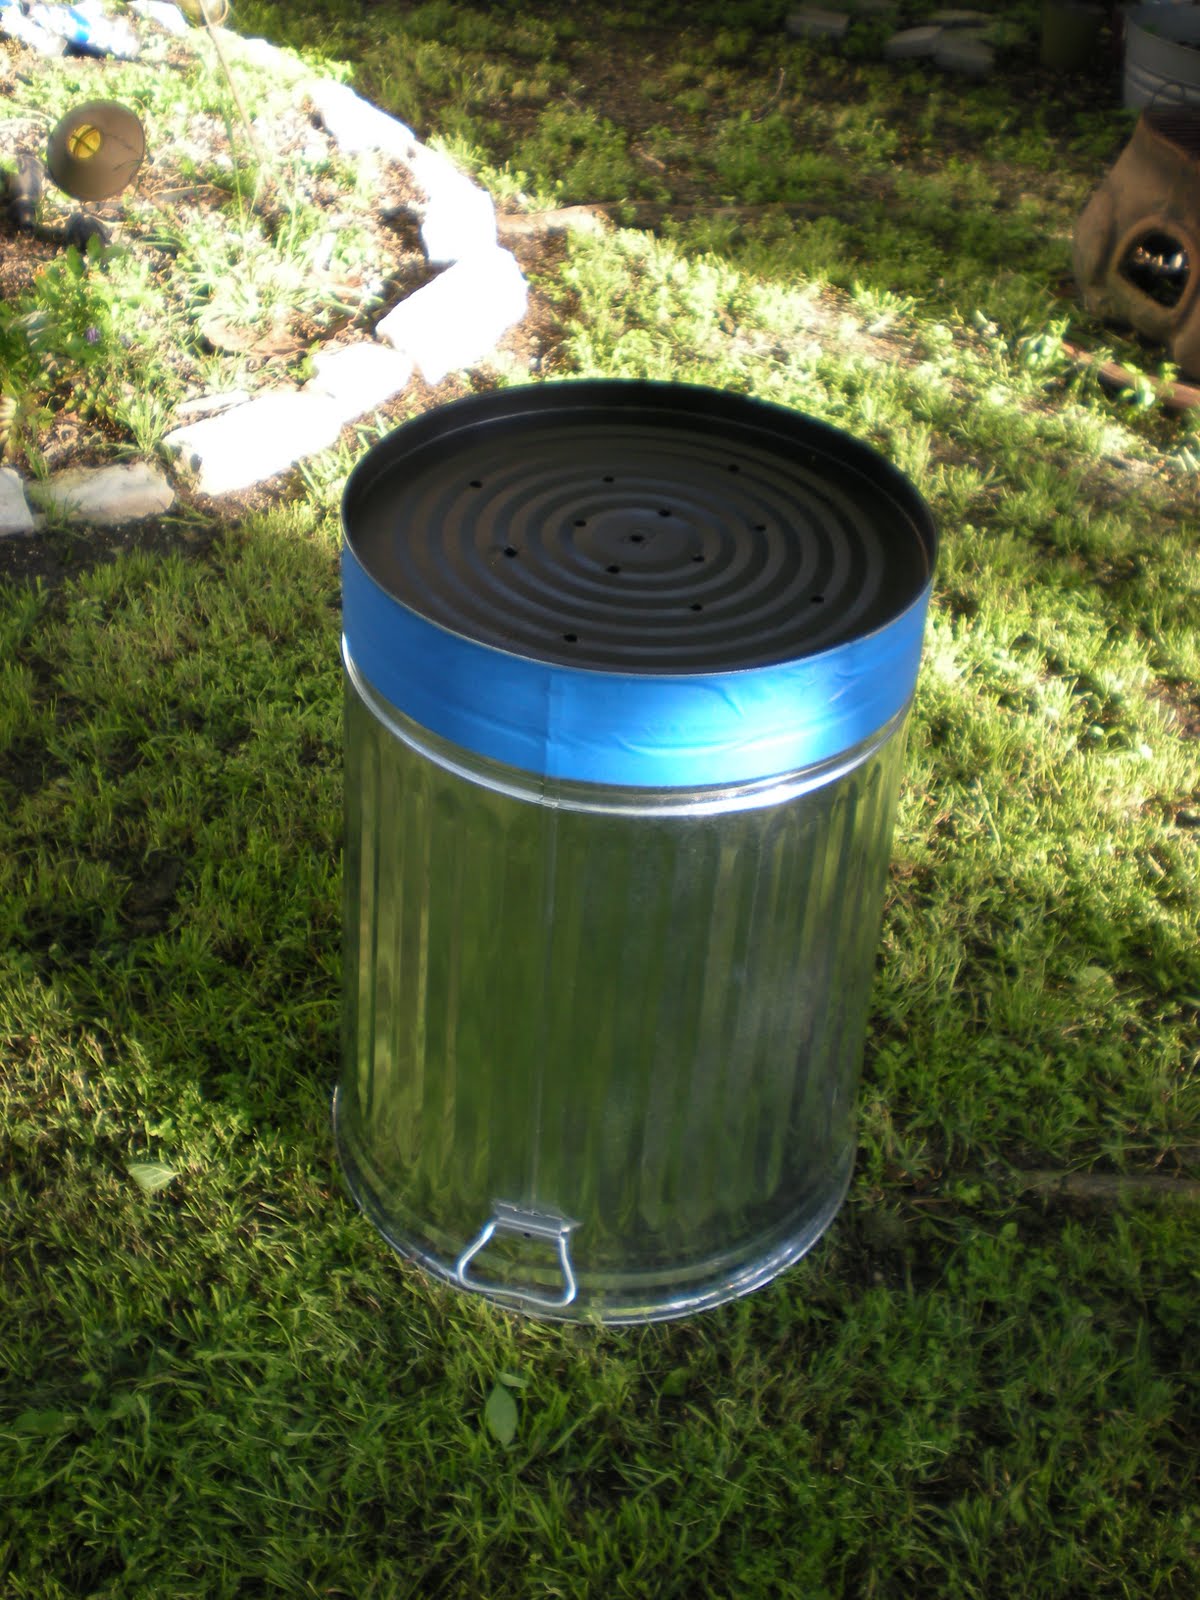
That's about it for an update for the progress on 4/23/10. Now for today.... Today's focus is the blackberry path. I want to get the trellises installed, and hopefully get the blackberries (re)planted. This doesn't sound like a lot, but it is. For the trellises, I have to alter three 20gallon trashcans. I need to reinforce the bottom, add a drainage system, set them into place, put in the 4" x 4" posts, and add 8" of concrete. Once the concrete is cured, the poles need to be cut to the same height, a couple of them need to be stained, and the rest of the can needs to be filled with soil and planted. The posts are left over from the Great Fence Build, and have been in our garage for a couple of years now, waiting to be used!! Yay, freecycling!
I started the morning marking some rocks with big "X"s in pink sidewalk chalk. I had forgotton to leave room for the dry creek bed in the blackberry path. I needed to pop these stones out so that I could fix that. Trent helped me out a LOT today, starting with this. He pulled the rocks out for me and stacked them on the pallets. The dry creek bed will coax runoff from the roof line down away from the house, to the street. The runoff has created a visible rivulet in the soil on the side of the house, so I'm just following that line and making it better. I hope. Fingers crossed. (Yes, eventually some good gutters will be installed, and will be attached to rain collection barrels, but in the meantime, need to keep the foundation healthy!)

Before
Pink Xs

After. It was sort of hard to see the removed stones, so I highlighted the area in yellow to help.

Here I'm making drainage tubes for the trashcans that are to hold the trellises. The idea is this - the trashcans are 24" tall. I'm only going to put concrete in the bottom 8". That'll be enough to anchor the posts. I'm going to fill the rest up with soil and plant them with varieties of mint. In order to be successful with this, the mint will need to be able to drain THROUGH the concrete. Not bloody likely!! So I've used scraps of pvc tubing left over from my frost cover frames to resolve this. Starting 9" from the bottom, I drilled lots of holes into the PVC. 'Cause the bottom 8" will be set in concrete, and I don't want that oozing out or clogging my drains, so no holes in the bottom 8". I've also capped the pipes, but didn't glue the caps on. This way, if they get clogged, I can pop the cap off and try to clean them out. The cap has some holes in it too. These drains will be set in holes drilled through the bottom of the can and held on with caulk until I can get the concrete in. Taa Daaa! Drainage. Who rocks?

Who needs a vise grip?
Ummmm.... not sure why this pic is here? Maybe I finished this path when Trent was out shooting hoops? That could be it. I would have deleted it, but the camera put a date/time stamp on it that made me think that it should stay.

These black discs are plywood, coated with pruning seal for waterproofing. The bottoms of the trashcans aren't flat. They have a half inch rim. If I put a bunch of concrete, a heavy wooden pole, and a bunch of soil into a trashcan with a floating bottom, the weld could pop and everything would fall apart. That would be no bueno. So, I cut these disks to fit the bottom of the trashcans, filling that void. They'll be screwed in from the bottom, and then the screws will be made permanent when the concrete goes in. Also, the holes for the drainage tubes will have to be cut through this wood AND the bottom of the can. God bless America, I make up difficult projects!
 I also used pruning seal on the bottoms of the cans. For extra longevity. 'Cause I ain't goin' through this again.
 The blackberries will then be planted into 30gallon trashcans. This is one of them. No need for fancy drainage systems, 'cause there isn't any concrete going in these cans. Just soil (backfill from the yard, amended with store bought compost and some of the "mulch that won't end"). I just drilled some holes into the bottom and coated it with the pruning seal. Just the outside - don't want that crap leeching into my berries.

Fifteen magical flutes! Er, drains. Five per can.

All of my watermelon babies have popped up! One of the varieties was a full 2 weeks later than the other two, but now they all look like the same size. Not quite sure if that bodes well for the late comer, or poorly for the early birds, or none of the above!
Didn't get to take "after" pics until dark. But what's cool about this is the fact that the paths sort of glow in the dark! They're so white that you can see them by moonlight. Yeah, sure, the flash helped, but you really CAN see them in the dark. This is the sidewalk path on the blackberry side of the house. I finished this today, between other things.
This was taken while standing atop the tallest pallet of rock. This is the sidewalk path, stretching from the driveway to the blackberry path. I took a few rocks out where east-west paths met north-south paths so that I could fit pieces to blend the intersection. VERY pleased with myself.

Sidewalk path meets driveway path.

See how they glow?! And see how the dark mulch paths offer such a nice contrast? I may have had a tear or two in my eyes at this point. It was a long day, for a lot of reasons. I'm SO in need of this project coming to an end. I feel like I'm running in slow motion. The finish line is in sight, and I'm giving it ALL that I've got, but I just can't get there fast enough.
Aside from the dry riverbed and the MYSTERY AREA, I only have one more path to lay, and the retaining wall. And the succulents. And...and...and, oh Crikey! Please let me off this ride!
As I said before, this was a frustrating day. I had to make a trip to Cedar Park to get an additional trash can (they aren't carried by the nearby big box stores anymore, at least not the 20gallon ones). That killed over an hour of work time. Later in the day, I also had to leave to get more pruning sealant so that was another 45 minutes down the drain. Trent worked with me on and off for most of the day, but we still didn't get everything done. I ran out of sealant while spraying the wooden disks, and we couldn't go forward without them being sealed. When I got back with more spray, I finished coating the first side of the disks, but it was late in the day and that meant that I couldn't do the second side until tomorrow. The cans couldn't be assembled until the disks were ready, so we were at a standstill. See what I mean? So close, yet so far! Give me strength! Goal setting is a wonderful thing, but when you don't meet them, it can be hard to recognize all you DID accomplish. Like how much more stone I laid when the trashcans couldn't be worked on anymore for the day.
I just need to keep my eyes on the prize. It's just so close. I can taste it.


